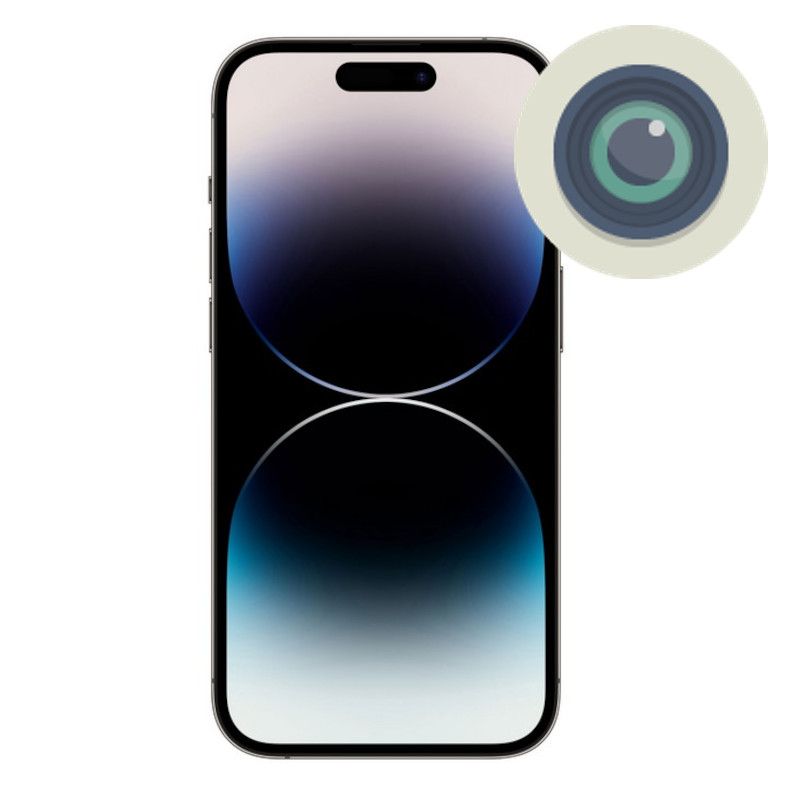
iPhone 14 Pro Max camera lens replacement cost is a significant consideration for owners facing damage to their device’s intricate camera system. The cost of repairing a damaged lens can vary widely depending on several factors, including the location, repair provider, and the specific lens affected. Understanding these factors is crucial for making informed decisions about repairing a damaged lens.
This guide explores the intricacies of iPhone 14 Pro Max camera lens replacement cost, providing valuable insights into the factors influencing price, the various repair options available, and the importance of preventative measures to safeguard your device’s camera system.
iPhone 14 Pro Max Camera Lens Replacement Cost Overview
Replacing a damaged camera lens on your iPhone 14 Pro Max can be a bummer, but it’s a fixable problem! The cost of this repair can vary, but we’ll give you the lowdown on what to expect.
Average Cost Range
The average cost to replace a damaged iPhone 14 Pro Max camera lens ranges from $150 to $300. This price depends on a few things, like where you get the repair done and what kind of lens needs replacing.
Factors Influencing the Cost
- Location: Repair costs can differ based on where you live. Big cities often have higher prices than smaller towns.
- Repair Provider: Apple Stores and authorized service providers typically charge more than independent repair shops.
- Lens Type: The main camera lens usually costs more to replace than the ultrawide or telephoto lenses.
Price Variations from Different Repair Services
Here’s a breakdown of estimated costs from different repair providers:
| Repair Provider | Estimated Cost |
|---|---|
| Apple Store | $200 – $300 |
| Authorized Service Provider | $175 – $250 |
| Independent Repair Shop | $100 – $200 |
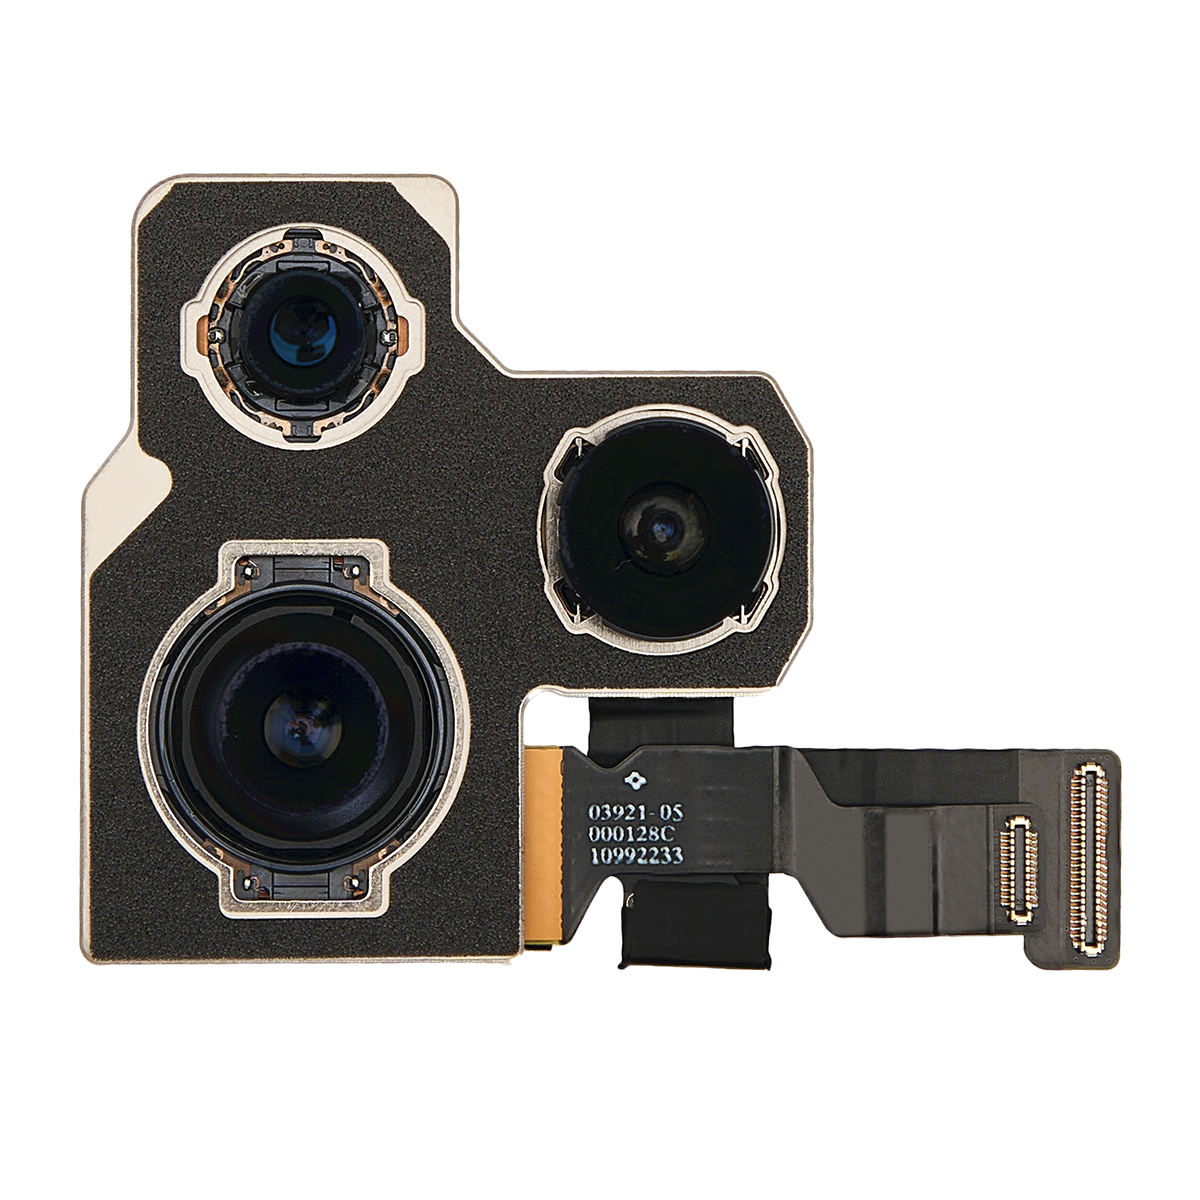
Common Causes of Camera Lens Damage

The iPhone 14 Pro Max boasts a stunning camera system, but its delicate lenses are susceptible to damage. Here’s a peek at the most common causes of iPhone camera lens damage, and some tips to keep your lenses in tip-top shape.
Drops and Impacts
Drops are the most common culprit for camera lens damage. When your iPhone takes a tumble, the camera lens is often the first to bear the brunt of the impact. A simple drop from a short distance can cause scratches, cracks, or even shatter the lens.
Scratches
Scratches can occur from rubbing the lens against rough surfaces, such as keys, coins, or even dust particles in your pocket. These scratches can impair image quality and make your photos look blurry or distorted.
Water Exposure
While the iPhone 14 Pro Max is water-resistant, it’s not waterproof. Prolonged exposure to water or submersion can damage the camera lens, leading to blurry photos or even complete failure.
Sand and Dust
Sand and dust can act like tiny abrasives, scratching the camera lens and impairing image quality. This is especially true in environments with high levels of dust or sand, such as beaches or construction sites.
Excessive Heat
Exposure to excessive heat can damage the camera lens, leading to blurry photos or even lens malfunction. Avoid leaving your iPhone in direct sunlight for prolonged periods, especially in hot climates.
Lens Cover Damage
If you use a lens cover, ensure it’s properly fitted and free of any scratches or damage. A damaged lens cover can actually scratch the camera lens itself.
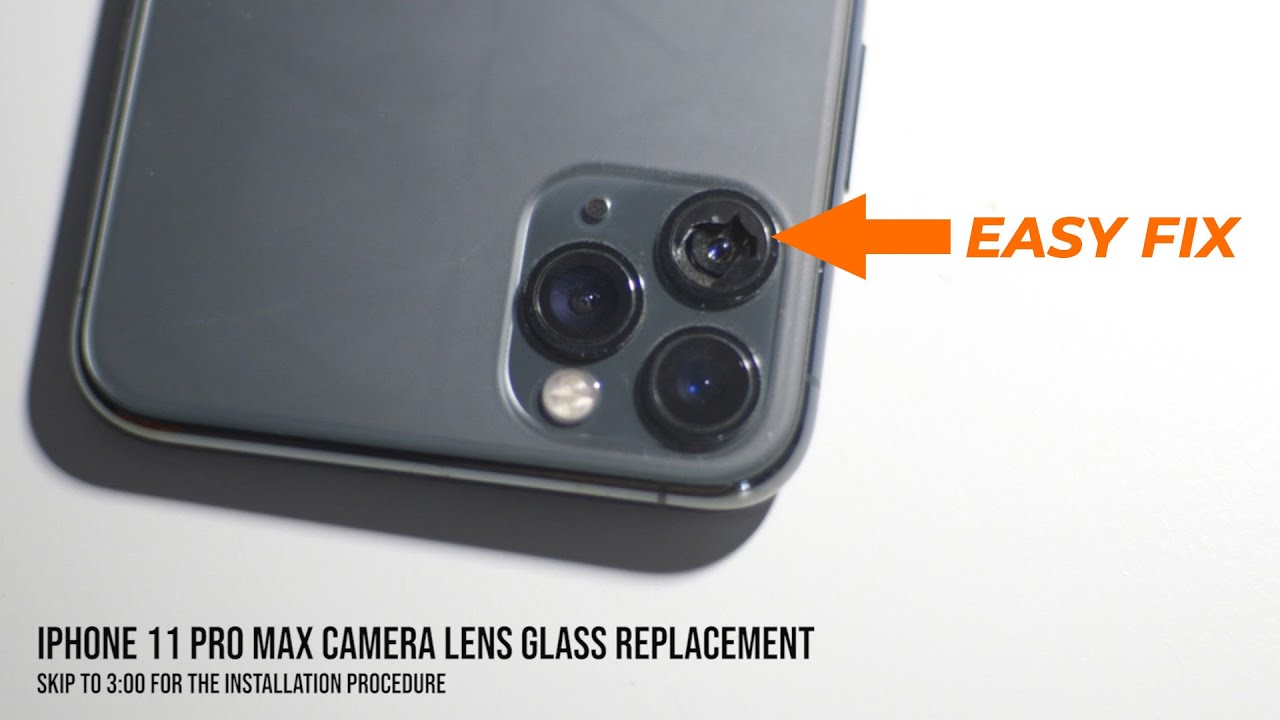
Repair Options for Damaged Lenses
When your iPhone 14 Pro Max camera lens takes a tumble, you’re left with a blurry view of the world. Luckily, there are several ways to get your camera back in tip-top shape. From official Apple repair to DIY solutions, let’s break down the different repair options and their pros and cons.
Repair Options for Damaged iPhone 14 Pro Max Camera Lenses
Choosing the right repair option for your damaged camera lens depends on your budget, technical skills, and desired turnaround time.
Replacing a cracked camera lens on your iPhone 14 Pro Max can be a costly affair, but it’s worth it to maintain the pristine quality of your photos. While you’re waiting for the repair, why not personalize your phone with a vibrant bring me the horizon iphone wallpaper ? After all, a great wallpaper can help you forget about the temporary inconvenience of a damaged lens.
- Apple Authorized Service Providers are your go-to for guaranteed quality and expertise. They use genuine Apple parts and have trained technicians who can handle complex repairs. However, they tend to be the most expensive option.
- Independent Repair Shops offer a more affordable alternative, often using third-party parts. While they might not have the same level of expertise as Apple, many independent shops have experienced technicians who can get the job done.
- DIY Repair Kits are the most budget-friendly option, but they require a certain level of technical skill. These kits usually include the necessary tools and parts to replace the damaged lens. However, if you’re not comfortable with DIY repairs, it’s best to leave it to the professionals.
Comparison of Repair Options
Here’s a quick breakdown of the pros and cons of each repair option:
| Repair Option | Pros | Cons |
|---|---|---|
| Apple Authorized Service Providers |
|
|
| Independent Repair Shops |
|
|
| DIY Repair Kits |
|
|
DIY Camera Lens Replacement

So, you’re thinking about taking matters into your own hands and replacing the camera lens on your iPhone 14 Pro Max? It’s definitely a tempting idea, especially if you’re on a tight budget and want to save some cash. But before you dive headfirst into this DIY adventure, let’s talk about the realities and risks involved.
Feasibility and Potential Risks
Replacing a camera lens on a smartphone is a delicate procedure that requires a steady hand and a good understanding of the device’s internal workings. While it’s certainly possible to do it yourself, there are several potential risks you need to be aware of:
- Damage to other components: The camera module is a complex part, and even a slight slip can lead to damage to the surrounding components, like the motherboard or other sensors. This could lead to further repairs and increased costs.
- Voiding the warranty: Attempting a DIY repair often voids your device’s warranty. If you’re not confident in your skills, it’s best to consult a professional to avoid potential complications.
- Loss of functionality: If the replacement lens isn’t properly installed, it could lead to issues with autofocus, image quality, or even complete camera failure.
- Static discharge: Handling electronic components without proper precautions can lead to static discharge, which can damage sensitive parts of your phone.
DIY Repair Kit and Tools
If you’re still determined to give DIY camera lens replacement a shot, here’s a list of essential tools and materials you’ll need:
- DIY repair kit: These kits usually include a specialized screwdriver set, tweezers, suction cups, and a replacement lens.
- Anti-static wrist strap: This will help prevent static discharge that could damage your phone.
- Magnifying glass: This will make it easier to see the tiny screws and components.
- Clean, lint-free cloth: This will help you keep the phone clean and free of dust during the repair process.
- Spare screws: It’s always a good idea to have spare screws on hand in case you lose any during the repair.
Step-by-Step Guide
Here’s a general guide for replacing the camera lens using a DIY repair kit:
- Power off your phone and remove the SIM card: This is a crucial safety precaution. You don’t want to accidentally turn on the phone during the repair process.
- Remove the back cover: Use a heat gun or hair dryer to gently warm the back cover and make it easier to remove. Be careful not to apply too much heat, as it could damage the phone.
- Disconnect the battery: This is another important safety step to prevent accidental short circuits.
- Remove the camera module: Carefully detach the camera module from the motherboard using the appropriate tools from your repair kit. Take note of the order of the screws and components, so you can reassemble everything correctly.
- Replace the lens: Carefully remove the old lens and replace it with the new one. Make sure the new lens is properly aligned and secured.
- Reassemble the phone: Reverse the steps above to reassemble your phone. Make sure all the screws are tightened securely and the components are properly connected.
- Test the camera: Once the phone is reassembled, power it on and test the camera to make sure everything is working correctly.
Important Note: This is a simplified guide. The specific steps may vary depending on the repair kit and your phone’s model. Always refer to the instructions provided with your repair kit for detailed guidance.
Warranty Coverage and Insurance Options
So, you’re facing a broken camera lens on your fancy iPhone 14 Pro Max, and you’re wondering about warranty and insurance. Don’t worry, we’ve got you covered. Let’s break down your options.
First things first, Apple’s standard warranty typically doesn’t cover accidental damage like a cracked camera lens. That’s where AppleCare+ and third-party insurance come into play.
AppleCare+ Coverage
AppleCare+ is Apple’s extended warranty program that offers protection against accidental damage. It’s a good option to consider if you’re prone to dropping your phone or experiencing other mishaps.
- Coverage: AppleCare+ covers two incidents of accidental damage, each with a service fee. For screen damage, the fee is lower than for other types of damage, like a broken camera lens.
- Benefits: The main benefit is peace of mind knowing you have coverage for accidental damage. You can also get priority support from Apple.
- Limitations: AppleCare+ has a deductible for each incident. The coverage is limited to two incidents over the duration of the plan.
Third-Party Insurance Options
If you’re looking for more comprehensive coverage or prefer a different type of insurance plan, consider third-party options.
- Coverage: Third-party insurance plans can offer coverage for various types of damage, including accidental damage, theft, and loss. Some plans may even include coverage for repairs from authorized repair shops.
- Benefits: You might find more flexible plans and lower deductibles compared to AppleCare+. You could also have the option to choose a plan with a wider range of coverage options.
- Limitations: Read the fine print carefully, as some plans may have restrictions or exclusions. The coverage may vary depending on the provider and plan.
Prevention and Maintenance Tips: Iphone 14 Pro Max Camera Lens Replacement Cost
Keeping your iPhone 14 Pro Max camera lens in tip-top shape is crucial for capturing stunning photos and videos. It’s like keeping your surfboard in perfect condition for catching the best waves. Here’s how to protect your lens and ensure it stays crystal clear.
Protecting Your Lens From Damage
Protecting your iPhone 14 Pro Max camera lens from damage is like protecting your favorite surf spot from pollution. It’s essential to keep it pristine for optimal performance.
- Avoid placing your phone on rough surfaces: Imagine your surfboard on a rocky beach – not a good idea! The same applies to your phone. Always place it on a smooth, clean surface to avoid scratches.
- Store it in a protective case: A case acts like a protective shell for your phone, shielding it from bumps and scratches. Think of it as your surfboard’s wax – providing a smooth, protective layer.
- Be mindful of your surroundings: Always be aware of your surroundings and avoid dropping your phone. It’s like keeping an eye out for rogue waves while surfing – you wouldn’t want to lose your board, right?
Cleaning the Lens, Iphone 14 pro max camera lens replacement cost
Cleaning your camera lens is like rinsing off your surfboard after a surf session. It removes salt and grime, keeping it in tip-top shape.
- Use a microfiber cloth: A microfiber cloth is like a soft towel for your phone, gently wiping away dust and fingerprints without scratching the lens.
- Avoid using harsh chemicals: Just like you wouldn’t use harsh cleaners on your surfboard, avoid using harsh chemicals on your phone’s lens. They can damage the delicate coating.
- Blow away dust particles: Before wiping, gently blow away any loose dust particles. It’s like clearing away debris from your surfboard before waxing.
Using a Protective Case and Screen Protector
A protective case and screen protector are like a surfboard leash and wax – they provide extra protection and keep your phone safe from harm.
- Choose a case with raised edges: A case with raised edges around the camera lens provides extra protection from scratches and bumps. It’s like having a protective layer around your surfboard’s fin.
- Use a tempered glass screen protector: A tempered glass screen protector provides a strong barrier against scratches and cracks. Think of it as a durable coating for your surfboard.
Questions Often Asked
How much does it cost to replace a cracked iPhone 14 Pro Max camera lens?
The cost to replace a cracked iPhone 14 Pro Max camera lens can range from $150 to $400 depending on the repair provider, location, and specific lens.
Is replacing a camera lens covered under AppleCare+?
Yes, replacing a damaged camera lens is typically covered under AppleCare+ with a service fee. However, it’s important to check the specific terms and conditions of your AppleCare+ plan.
Can I replace the camera lens myself?
While DIY camera lens replacement is possible, it’s generally not recommended due to the complexity of the repair and the potential for further damage.
